(I know I’m actually posting this on Saturday, but it takes time to get used to all the steps involved in creating a blog entry! I’m still trying to figure this thing out…)
We went out to lunch the other day and indulged in a piece of ‘key lime’ pie for dessert. It’s usually one of my favourite things to have, but this piece was disappointingly fake and ‘creamy’ – it tasted like there was more cool-whip and air in the recipe than lime. I could do better than that in my own kitchen, and so can you. Fortunately, it’s easy to make your own, even if you can’t get Key Limes. Regular limes are cheap and easily available (they were eight for a dollar at our Farmers market this week!), and the end result tastes pretty much the same. One of the nice things about a Key Lime pie is how very simple it is to make. If you don’t have limes, you can use exactly the same recipe with lemons… and if you add some cream cheese you get a basic cheesecake! Either way, it’s delicious.
Firstly, assemble your ingredients. As you can see there aren’t a lot of fancy things needed – limes, condensed milk, a packet of biscuits/cookies/graham crackers, some eggs, and some butter is all it takes. Plus you need a big bowl, a fine grater or a zester (if you’ve got a microplane all the better, but I’m not so lucky!) and a baking dish.You don’t even need a food processor…
You may have seen Key Lime pie with a graham cracker crust… we don’t have graham crackers in Australia, so the traditional go-to for crumb crusts is a Marie biscuit. They’re readily available, easy to crumb, and they have a distinctively mild flavour that makes a nice neutral crust. Plus they’re cheap – look in the Mexican aisle of your grocers, or in the ‘imported’ section of the store and they’re only about 80c a pack. Open your pack of biscuits and put them into a big ziplock bag. Then whack the heck out of them with a rolling pin. It won’t take long to reduce them to rubble, and you don’t have a dirty food processer to wash.
I like one-bowl cookery… so while you can mess around with six different dishes, I’m not going to unless it’s really necessary. When you’re making a crumbcrust you need three things – crumbs, melted butter, and a little sugar to taste. It doesn’t really make any difference which order you put them into the bowl, so I melt the stick of butter BEFORE I do anything else and then dump the rest of the ingredients on top of it. It all comes out the same in the end!
Mix everything together until it looks like damp sand. If you pick up a little handful and squish them they should stick together for a moment. If they don’t, add a little more butter.
Grease a baking, pie or cheesecake pan well. This helps the crumbs to stick to the sides of the container while they’re dry, and it will help them to release later. Tip your crumbs into the dish and press them down into a crust with the palm of your hand, and then bake it at 300 degrees for 15 minutes. It doesn’t really need to cook, but the heat helps to set the crust into one piece.
While the crust is baking, you can assemble the rest of the ingredients and make the filling. The first and most important ingredient is the limes, and the first thing you need to do is to grate your zest (that’s just a fancy way of saying the skin…) Pick the two or three limes with the nicest looking outside and rinse them off. If you’re using actual key limes you’ll need to use at least twice as many – they’re much smaller and have less surface area! Grab your grater or your zester and shred the lime zest into your big mixing bowl. Try not to get too much of the white bits into the bowl – the white is where the bitter taste is. If you have a microplane all the better, but if not the finest side of a regular box grater or a small hand-held grater will work just fine.
When you’ve finished zesting, cut the now-naked limes in half and sqeeze them on your juicer, and add as many more as you need. I’m making a big tart to feed a crowd, so I used a cup and a half of lime juice, but for say an 8-inch pie dish you’d only need 1/2 cup. But honestly, it’s one of those things where the more you put in the better. I’ve always used at least twice as much juice as the recipe suggests because it makes for a much more intense flavour.
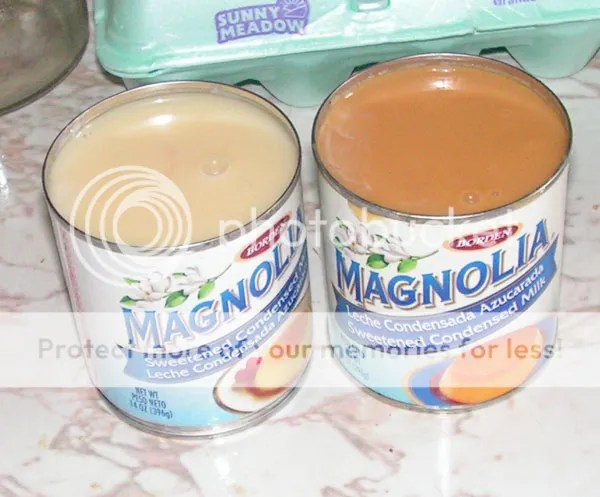
Set your lime juice aside for a minute. You don’t need it until the crumb crust is out of the oven but it pays to be prepared. Open your condensed milk. A small pie will only need one can, but again I’m making a double-batch so I used two. Note the colour of the cans – one of the cans was freshly purchased and the other has been sitting in my pantry cupboard for just over a year. This does not mean that it’s gone bad! Condensed milk is made by cooking milk, and if you store if for a long period it will gradually get darker, thicker and more caramelized-looking… but it’s still perfectly good unless there’s any visible sign of damage to the can. Never use a bulging, leaking, or very rusted tin for ANYTHING. Your life is worth more than a few dollars in canned goods.
Got your condensed milk open now? Scrape it into the mixing bowl on top of the lime zest and whisk it in. The next thing you need are the eggs. You only need to use the yolks for this recipe, so separate the eggs into a small bowl using whatever method you prefer and put the whites aside. As you can see, I broke a couple of yolks and got a little bit mixed in with the whites, so I won’t be making meringues any time soon! But for the purposes of making the pie it really doesn’t matter… 6 eggs for this big pie, 3 for a little one.
Whisk the eggs into the condensed milk and make sure there aren’t any little blobby bits left in it. Nobody wants little blobby lumps in their pie if they can help it! The more you whisk the mixture at this stage the lighter and fluffier it will be.
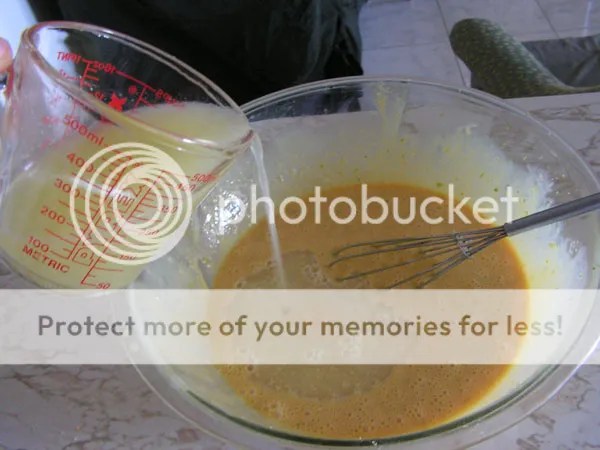
Is your crumb crust out of the oven yet? If not, stop right here and wait. When the oven timer goes off and you take the crust out, set it down on top of the stove or on a cooling rack and do the last step of the recipe. You’re in the home stretch now! Pour the lime juice into your condensed milk mixture and start whisking. The acid in the lime juice will react with the condensed milk and start to thicken it up right away. It looks a little strange as you first start to mix, so just keep whisking. In a minute or two you should have a nice smooth mix.
Pour the mix into the crumb crust and put it back into the oven for about 30 minutes. Take it out the oven and cool it on a rack, then put it into the fridge for a few hours to chill. I can’t show you what it looks like on a plate because I’m taking the pie to church tomorrow, but take my word for it that it tastes great!
Tags: dessert, Friday Feasting, recipe


August 15, 2009 at 3:40 pm |
That REALLY looks good. I’m going to have to try it.
August 15, 2009 at 11:20 pm |
Looks like you are off to a great start on your blog.
I hope you have as much fun with yours as I do mine.
koko